First, cut squares. I cut my squares 4 1/2 inches wide. You'll need two squares for each bean bag.

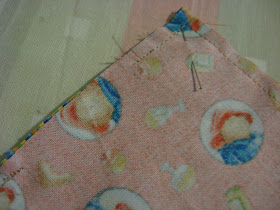
Next, put two squares right sides together. Put a pin in each corner:

Sew around the outside of your bean bag, using a 1/4" seam allowance (if a child is sewing these, cut your squares a little larger and use a 1/2" seam allowance), backstitching at beginning and end, pivoting at the corners, and leaving an opening along one edge about 2" wide.

Turn right side out. Use a pair of closed scissors, a chopstick, or a pencil to gently push the corners out.

Fill about 2/3 full with rice or beans. A funnel is a great help in getting the rice in. Pin the opening shut, with seam allowance folded inward.

Sew along the edge of the opening, making sure to catch both sides as you sew.

Now go find some games to play with your new bean bags!
It's a rainy day here, hence the darkness of the pictures. Also, I would like to note that I just washed my ironing board cover so it is clean, it just has mysterious stains on it. ;-)
Cute! Love that Paddington fabric. Sue
ReplyDeletecooool! will make these for sure, I totally forgot about how fun :) thanks for the tutorial!
ReplyDeleteThanks Sue! I've been reading Paddington books from the library so when I dug through my scraps I chose those!
ReplyDeleteOpen Roads Mama - hope your little BB enjoys them! :-)
My dad used to play a game with use and we still laugh about it to this day. He would sit in his recliner armed with beanbags. My brother and I would run in zig zag patterns down the hall. Dad would try to pelt us with the beanbags as we ran! Seems so wrong to type it all out, but we were always breathless with laughter during the wars! Gotta love a beanbag (and yours are super cute)!!
ReplyDeleteKristi, sounds fun! I'm sure he was aiming carefully! :-)
ReplyDeletecute! what a fun little toy/gift!
ReplyDelete